Just last month, I was tasked to provide training material for EnyoJS. To my surprise I found out that, there are some shift in development method, introduction of new CommonJS style and some of my previous tutorials are now rather obsolete. Took me quite a while to get back on track on the development environment and mode.
So today, I’ll be sharing how to setup new development environment for EnyoJS 2.7 aka Strawman
Before we start, we need to get ready some really handy tools and editor to continue our journey.
Coding Tools
- Visual Studio Code (This is by far the best lightweight coding editor with a build in JS linter (checks enyo json syntax for you as you type for your JS programming needs – best of all it’s FREE and available in all major platform Windows, Mac and Linux). Get it here.
- Git-SCM installed into your system. npm will use this to grab files required in open source git repositories. Get Git-SCM here.
- NodeJS installed into your system. This will be needed to pull latest files from online repository to form our development environment. You will also need to make sure npm runs in the terminal. Look on guide on how to install NodeJS here.


Enyo Development Kit and Tools
In previous EnyoJS version we can just obtained those libraries via downloading from the site. In 2.7, we will need install the development kit and tools using npm. After that, we can simply create a folder and execute enyo init command in terminal to download and install all the necessary dependencies and libraries required to run an enyoJS 2.7 project. You will also need to recompile the codes every time you make the changes much like you did when developing a native app.
Take note, Enyo is now a core separated from the it default UI framework – Onyx. You will now need to assemble at additional sub-projects to get it up and running. Below are the list of other projects needed for a skeletal EnyoJS project (not using any additional ui framework; meaning, we style our own button, input box and pages with our own css). Below are the list of core libraries needed.
- Enyo – Core (Mandatory : Comes by default when we execute enyo init)
- Layout Framework (This is the library where we use our fittable layouts, List etc.)
HOW TO GET Enyo (Sometimes known as Enyo Dev Tools)
Fastest way to get this, is to use Node Package Manager or npm for short. Since you have already installed it. Go ahead open up the terminal (make sure you are in admin mode) or console.
npm install -g enyo-dev
Note : the option -g is to install enyo-dev as globally. Run this command and it will download the enyo dev tools. If you are wondering where it is installed after the command is issued. See below.
For Mac
/usr/local/lib/node_modulesFor Windows 10
C:\Users\<YourUsername>\AppData\Roaming\npm\node_modules\enyo-devFor Linux Mint
$HOME/.npm-global/lib/node_modules/enyo-dev
Doing this, you can now deploy a new Enyo project template, derived from enyo-dev tools. Just create a folder, goto the folder (Note: make sure project name must not have spaces in between – all lowered cased) and execute a terminal command line: –
enyo init
Once enyo init command line done its job, we then can pack and deploy enyo into a distribute version by using command line …
enyo pack
You will notice dist folder is created. dist (it also creates an index.html too) or distributable folder is where your finalized compiled enyo code is placed.
Note: Build into Visual Studio Code, is the Integrated Terminal – where you can directly execute these two command at ease. To enable it, Goto View > Integrated Terminal.
Next we create a src and assets within the project folder. Same level with dist folder. This is to place all your subsequent pages, modules and components. Assets folder is where you place your images and icon files.

Next, I’ll explain about the package.json which is enyo pack is referring to when compiling. Package.json im referring to is the one located at the root of the project folder. By default this is schema looks like…
{
       "name": "your-project-folder-name",
       "main": "index.js",
       "assets": [],
       "styles": [],
       "devAssets": [],
       "moduleDir": "src"
}
The critical area we need to associate our project with package.json is the location of our css and assets location. You may change the filename of the main file as well. By default is index.js. If you rename index.js filename you must remember to associate it in package.json. Take a look at samples below.
{
	  "name": "enyo-test",
	  "main": "index.js",
	  "assets": [
	    "assets/*.png",
	    "assets/*.jpg"
	  ],
	  "styles": [
	      "src/css/style.less"
	  ],
	  "devAssets": [],
	  "moduleDir": "src"
}
If you associate the styles and assets folder correctly, you will see those files copied over to dist folder automatically once you compile using enyo pack
HOW TO GET Layout Framework for Enyo
Layout framework is a powerful add-on to enyo to control and resize it layout based on device width and height. It is must have for all enyo project.
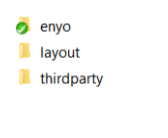
However, this library is separated from core enyo. All libraries should be place into the lib folder . For example, if you look at lib folder there’s enyo folder. We need to download the layout library folder and place it in there as well. I also prefer to placed my thirdparty (i put them into thirdparty folder) library here as well. For example, moment.js and some other javascript libraries.
Next we going to download the layout library using npm again. Go to the root folder and execute command
npm install enyojs/layout
A folder node_modules will be created on the root of the project folder. This houses the library downloaded within. Just copy the layout folder (it has all the libraries src needed) to lib folder – Thats it.
Side Note for those migrating from Enyo 2.2: Other than how view page kind is written, you can still reused most of the enyo core codes such as …
- published method
- hasNode
- waterfalling events
- reference using this.$.<kind’s name property>
- bubbling events
- Enyo.Signal
- using statics
Note: There’s some changes in the way we include viewpages renderInto which affects our navigation and some UI component is transfer into enyo.Layout library instead e.g. List.
In the next tutorial, I will touch a bit on ViewPages and what are the changes since 2.2. Until then hope this is useful!
Thanks. I got an error on mac osX Mojave when is installing.
gyp WARN EACCES user “root” does not have permission to access the dev dir “/Users/mamisho/.node-gyp/10.13.0”
gyp WARN EACCES attempting to reinstall using temporary dev dir “/usr/local/lib/node_modules/enyo-dev/node_modules/dtrace-provider/.node-gyp”
gyp WARN install got an error, rolling back install
gyp WARN install got an error, rolling back install
gyp ERR! configure error
gyp ERR! stack Error: EACCES: permission denied, mkdir ‘/usr/local/lib/node_modules/enyo-dev/node_modules/dtrace-provider/.node-gyp’
gyp ERR! System Darwin 18.2.0
gyp ERR! command “/usr/local/bin/node” “/usr/local/lib/node_modules/npm/node_modules/node-gyp/bin/node-gyp.js” “rebuild”
gyp ERR! cwd /usr/local/lib/node_modules/enyo-dev/node_modules/dtrace-provider
gyp ERR! node -v v10.13.0
gyp ERR! node-gyp -v v3.8.0
gyp ERR! not ok
I solved adding this –unsafe-perm
sudo npm install -g enyo-dev –unsafe-perm
I hope help it someone