Yup, today I’m going to walk you through on how to set up an IIS 6.0 Virtual SMTP Server instance that connects to a Gmail account. This method of setup is considered pretty old school (you need this supposedly you some diehard old application running on a newer server) and requires the following prerequisite
- Your own instance of IIS 7.0+ with full administrative access. This will be our base Virtual SMTP Server.
- You other servers able to connect to your base Virtual SMTP Server.
- A Gmail account you are using to send the email with POP3 enabled.
Installing IIS 6.0 Management Compatibility Feature
- Go to Server Manager, look for the Manage pull-down menu. Look for Add Roles and Features. Click on it.
- An Installation Wizard will appear, select Role-based or Feature-based Installation. Next
- Select your server after that or just hit next, if there is only one choice.
- You will prompt a list of check boxes and options under the Server Roles section.
- Look for Web Server, click on open up the selections. Then look for Management Tools
- Select IIS Management Console, Management Compatibility and Services.
- Once installed you might need to restart the server.

Installing Virtual SMTP Server on IIS 6.0 Manager Console
- Once, the server is restart, its time to install Virtual SMTP Server on top of IIS.
- Head towards the Add Roles and Features. Click on it. Click straight to the Features section.
- Look and Select on SMTP Server.
- Perform Installation as usual.

Setting Up SMTP for Google Mail
- To configure Virtual SMTP, head towards Server Manager > Tools > Look for Internet Information Services (IIS) 6.0 Manager.
- Look for [SMTP Virtual Server #1] right-click to change its properties.
- The first configuration, will be under Access, look for Access Tab, click on Authentication. Click on only Anonymous Access. Click OK.

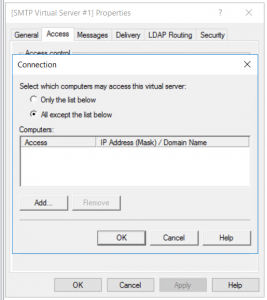
- Next, we move on to Connection, this is where we whitelist which server IP that can connect to SMTP server. For now we check on All except the list below. Note: This will allow all IPs to connect to SMTP server with the exception of the ones listed below. If the list below is empty then, there is no restriction. Click OK.
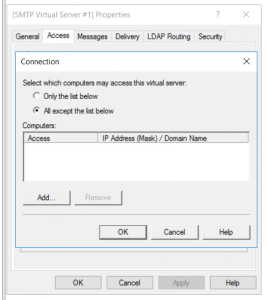
- Then, we move on to Relay, which determines which computer can relay through this server. Again for now we check on All except the list below.
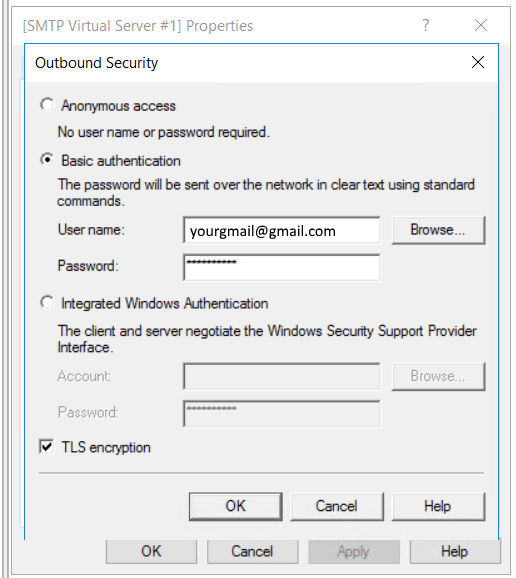
- Next Configuration will be on Delivery Tab, look for Outbound Security… below. Now, this is where you have to get your App Password ready from Gmail. To learn how to set up App Password refer to this page.
- Under Basic Authentication, fill up your Gmail account email and specifically under Password, this is where you enter your App Password without spaces just pure 16 digits.

- You should Check TLS and hit the OK button to save.
- Click for Outbound connections… configure TCP Port to 587. Hit Ok to save.
- Final setup, under Advanced… Smart host enter smtp.gmail.com . Hit Ok to save.


Restart IIS from Within
- While still inside IIS 6.0 Manager Console. Click on server name above your [SMTP Virtual Server #1]. Right-click it and select All Tasks… > Restart IIS…
Test Script
- You can execute a simple Powershell script to test the smtp below. This script can be triggered in any server or workstation whitelisted in your settings.
Send-MailMessage –From sender@email.com –To receiver@email.com –Subject “Test Email From Relay” –Body “This is a test message. If you received this email means the relay its working at tip top shape.” -SmtpServer <your server IP>